Hey there, tech enthusiasts! If you're looking to dive into the world of remote IoT device management, you're in the right place. Remotely accessing IoT devices using SSH over the web for free with AWS is not just a cool trick—it’s a game-changer for developers, hobbyists, and businesses alike. Whether you’re tinkering with a Raspberry Pi or managing a fleet of smart devices, SSH access through AWS opens up endless possibilities.
Imagine being able to control your IoT devices from anywhere in the world without breaking the bank. No expensive server setups, no complicated configurations—just simple, secure, and scalable solutions. AWS offers a free tier that makes this possible, and we’re here to show you how.
In this guide, we’ll break down everything you need to know about remotely accessing IoT devices via SSH on the web for free with AWS. From setting up your environment to troubleshooting common issues, we’ve got you covered. So grab your coffee, get comfy, and let’s get started!
Read also:Why Olivia Dunnes Feet Are Stealing The Spotlight In 2023
Table of Contents
- Introduction to Remotely Accessing IoT Devices
- Why Use SSH for IoT Devices?
- Understanding AWS Free Tier
- Setting Up SSH Access with AWS
- Ensuring Security for Your IoT Devices
- Tools You’ll Need for the Process
- Common Issues and How to Fix Them
- Exploring Advanced Features
- Saving Costs with AWS Free Tier
- Wrapping It Up
Introduction to Remotely Accessing IoT Devices
Before we dive into the nitty-gritty of SSH and AWS, let’s talk about why remotely accessing IoT devices is such a big deal. IoT, or the Internet of Things, is all about connecting everyday objects to the internet. From smart thermostats to industrial sensors, these devices generate valuable data that can be used to improve efficiency, reduce costs, and enhance user experiences.
But what happens when you need to manage these devices from afar? That’s where remote access comes in. By using SSH (Secure Shell), you can securely connect to your IoT devices over the internet and perform tasks like configuration, monitoring, and troubleshooting. And the best part? You can do all of this for free with AWS!
Why Remote Access Matters
Remote access isn’t just a convenience—it’s a necessity. Whether you’re a developer working on a project or a business managing a network of IoT devices, having the ability to access your devices from anywhere can save you time and money. Plus, with the rise of remote work, being able to manage your IoT infrastructure without being physically present is more important than ever.
Why Use SSH for IoT Devices?
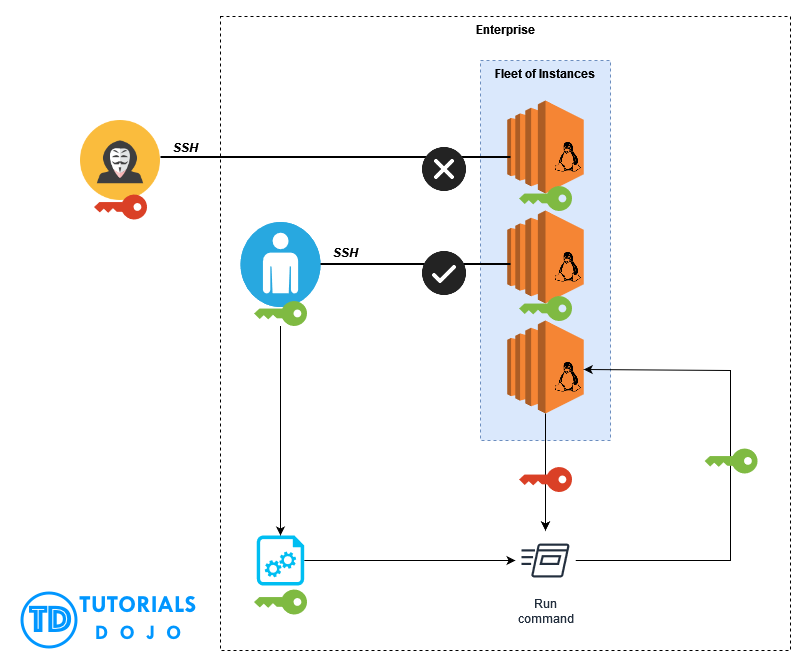
SSH is one of the most secure and reliable ways to remotely access devices. It provides encrypted communication between your local machine and the remote device, ensuring that your data remains safe from prying eyes. But why is SSH such a popular choice for IoT devices?
- Security: SSH uses encryption to protect your data from hackers and unauthorized access.
- Reliability: SSH connections are stable and can handle interruptions without losing data.
- Flexibility: You can use SSH to perform a wide range of tasks, from running commands to transferring files.
For IoT devices, SSH offers a secure and efficient way to manage your devices without compromising on performance. And with AWS, you can take advantage of cloud-based solutions to make the process even easier.
Understanding AWS Free Tier
AWS Free Tier is a game-changer for developers and businesses looking to experiment with cloud computing without breaking the bank. With the free tier, you get access to a range of AWS services, including EC2 instances, S3 storage, and more—all for free for the first 12 months.
Read also:Eevie Aspenleaks The Untold Story Thats Got Everyone Talking
For our purposes, we’ll be using EC2 instances to set up SSH access for our IoT devices. EC2 allows you to launch virtual servers in the cloud, which can act as a bridge between your local machine and your IoT devices. And the best part? You can do all of this for free with the AWS Free Tier.
What’s Included in the Free Tier?
Here’s a quick rundown of what you get with AWS Free Tier:
- 750 hours per month of EC2 t2.micro instances
- 30GB of S3 storage
- 20GB of data transfer out per month
- Unlimited data transfer within AWS
These resources are more than enough to get started with remotely accessing IoT devices via SSH. Plus, you can always upgrade to a paid plan if you need more resources down the line.
Setting Up SSH Access with AWS
Now that we’ve covered the basics, let’s dive into the setup process. Here’s a step-by-step guide to help you get started:
Step 1: Create an AWS Account
If you don’t already have an AWS account, you’ll need to create one. Head over to the AWS website and sign up for a free account. Once you’ve signed up, activate the free tier to get access to the resources you’ll need.
Step 2: Launch an EC2 Instance
Next, you’ll need to launch an EC2 instance. Here’s how:
- Log in to the AWS Management Console.
- Go to the EC2 dashboard and click “Launch Instance.”
- Select a free tier eligible AMI (Amazon Machine Image).
- Choose an instance type (t2.micro is recommended for the free tier).
- Configure the instance settings as needed.
- Create a new key pair or use an existing one.
- Review and launch your instance.
Step 3: Configure Security Groups
Security groups act as virtual firewalls for your EC2 instances. You’ll need to configure them to allow SSH access from your local machine. Here’s how:
- Go to the EC2 dashboard and select “Security Groups.”
- Click “Create Security Group” and give it a name.
- Add a rule for SSH (port 22) and specify your IP address or use “0.0.0.0/0” to allow access from anywhere.
- Apply the security group to your instance.
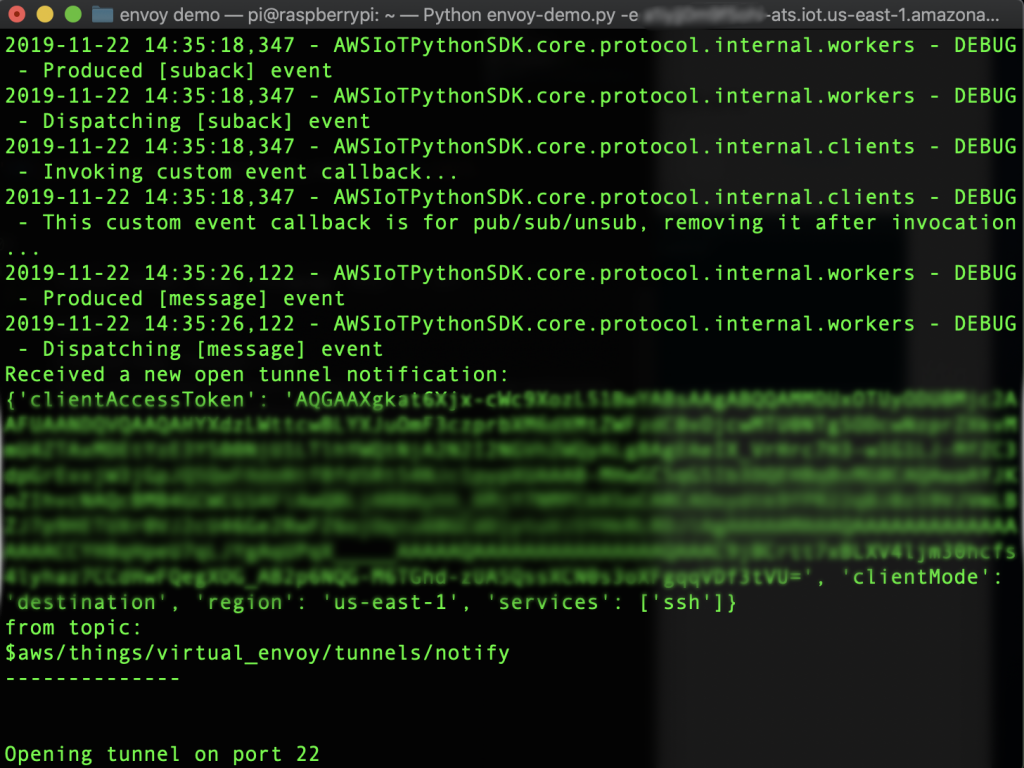
Step 4: Connect to Your IoT Device
Once your EC2 instance is up and running, you can use it to connect to your IoT device via SSH. Here’s how:
- Download and install an SSH client (like PuTTY or OpenSSH).
- Use the public DNS of your EC2 instance to connect.
- Log in using the key pair you created earlier.
- From there, you can connect to your IoT device using its IP address or hostname.
Ensuring Security for Your IoT Devices
Security should always be a top priority when dealing with IoT devices. While SSH is a secure protocol, there are still steps you can take to further protect your devices:
- Use Strong Passwords: Make sure your SSH keys and device passwords are strong and unique.
- Limit Access: Restrict access to your EC2 instance and IoT devices by using security groups and IP whitelisting.
- Keep Software Updated: Regularly update your devices and software to patch any vulnerabilities.
- Monitor Activity: Use tools like AWS CloudTrail to monitor activity and detect any suspicious behavior.
Tools You’ll Need for the Process
To successfully set up SSH access for your IoT devices, you’ll need a few tools:
- AWS Management Console: The web interface for managing your AWS resources.
- SSH Client: A tool for connecting to your EC2 instance and IoT devices (e.g., PuTTY, OpenSSH).
- Key Pair: A set of cryptographic keys used for authentication.
- IoT Device: The device you want to remotely access (e.g., Raspberry Pi, Arduino).
Having these tools in place will make the setup process much smoother and more efficient.
Common Issues and How to Fix Them
Even with the best-laid plans, things can go wrong. Here are some common issues you might encounter and how to fix them:
Issue 1: Unable to Connect via SSH
If you’re unable to connect to your EC2 instance via SSH, check the following:
- Make sure your security group allows SSH traffic.
- Verify that your key pair is correct and has the proper permissions.
- Ensure that your instance is running and has a public IP address.
Issue 2: Slow Connection Speeds
If your SSH connection is slow, try the following:
- Use a faster internet connection.
- Optimize your EC2 instance settings.
- Consider upgrading to a paid plan if you need more resources.
Exploring Advanced Features
Once you’ve mastered the basics, you can start exploring advanced features to take your IoT setup to the next level. Here are a few ideas:
- Automate Tasks: Use scripts to automate repetitive tasks like backups and updates.
- Set Up Monitoring: Use tools like AWS CloudWatch to monitor your devices and receive alerts.
- Integrate with Other Services: Connect your IoT devices to other AWS services like Lambda and S3 for added functionality.
By leveraging these advanced features, you can create a robust and scalable IoT infrastructure that meets your needs.
Saving Costs with AWS Free Tier
One of the biggest advantages of using AWS for remotely accessing IoT devices is the cost savings. With the free tier, you can experiment with cloud computing without worrying about expenses. And if you need more resources down the line, AWS offers flexible pricing plans that scale with your needs.
By taking advantage of the free tier, you can save money while still getting access to powerful tools and services. Plus, AWS offers a wide range of resources and documentation to help you get the most out of your setup.
Wrapping It Up
Remotely accessing IoT devices via SSH on the web for free with AWS is a powerful solution for developers and businesses alike. By following the steps outlined in this guide, you can set up a secure and efficient system for managing your IoT devices from anywhere in the world.
Remember, security should always be a top priority when dealing with IoT devices. Use strong passwords, limit access, and keep your software up to date to protect your devices from potential threats.
So what are you waiting for? Grab your AWS account, launch an EC2 instance, and start exploring the world of remote IoT device management. And don’t forget to share your experiences in the comments below!